Wolf Dehydrate Mode: Plan the Kit, Schedule and First Batch
Plan a Wolf Dehydrate session with the correct accessory kit, model instructions, a realistic schedule and useful first-batch observations.
Call (224) 347-1756 ↗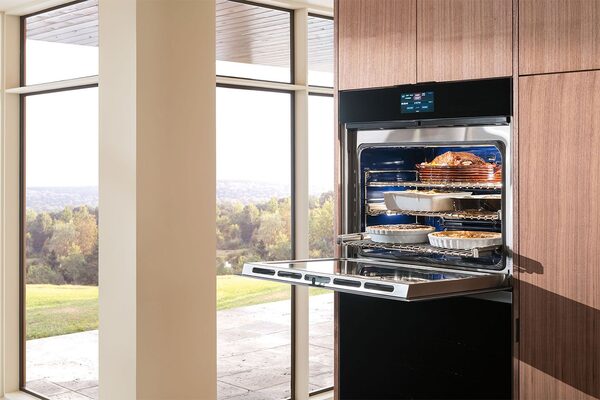
Start with the oven you own
Dehydrate can be an unfamiliar setting even in a kitchen where the Wolf oven gets used every day. Before turning a collection of fruit or herbs into a long experiment, identify the appliance and establish which instructions apply. A useful first session starts with the right accessory, a realistic schedule and a recipe suited to the equipment. It should not start with a button sequence borrowed from a different control panel or an assumption that every low temperature cooking mode behaves alike.
Write the full model number in your kitchen notes and identify the oven cavity you intend to use. In a double oven, record upper or lower; on a range with two cavities, record left or right. Find the corresponding owner guide through Wolf's official product documentation. Compare the illustration of the controls with your actual appliance. A familiar brand name or similar looking handle is not enough to establish that a downloaded document covers your oven.
Confirm the mode and accessory together
Wolf's general guidance describes Dehydration as a feature of electric ovens, including dual fuel ranges. Its accessory information distinguishes current and legacy kits, with different rack dimensions and contents. The company does not list a dehydration kit for its gas ranges or Wolf Gourmet countertop ovens. These distinctions matter before placing an order: the word Wolf on an appliance does not establish compatibility with a particular rack set or door stop.
Make a small purchase record with model, cavity width, kit number and the source that confirmed the match. If an accessory came with a previously owned home, compare it with the official instructions rather than assuming its presence proves compatibility. Photograph the loose pieces on a counter. Ask the manufacturer or parts supplier to resolve missing components before use. A rack that fits through the opening is not necessarily the appropriate dehydration accessory for the selected cavity.
Keep the door arrangement model specific
Read the installation instructions supplied with the correct kit before arranging food. Some systems use an accessory door stop, and the effect on oven lighting varies by series. Follow the exact instructions for your appliance. Do not substitute a utensil, folded towel or improvised wedge. Do not manipulate a switch or latch to persuade the oven to operate. If the correct part will not install as illustrated, stop and confirm the model and component rather than pushing harder.
Door position is part of the process, not merely a convenience for checking progress. Plan the work area so that someone walking through the kitchen will not bump the door or the projecting accessory. Keep children and pets away from the appliance while it operates. Tell other household members that this is a planned cooking session, including which cavity is in use. That simple communication prevents someone from removing a component they mistake for an object left behind during cleaning.
Choose a modest first batch
Begin with one recipe and one type of ingredient instead of filling every available space. Select a reliable recipe that specifies preparation, drying conditions and storage for the food being used. The oven instructions explain appliance operation; they do not turn an arbitrary drying schedule into a validated preservation process. This article does not provide meat drying, shelf stability or storage safety instructions. Use a reliable food preservation reference for those decisions, including any additional treatment the selected food requires.
For a first comparison, keep preparation consistent across the batch. Record the ingredient, approximate slice thickness and the amount loaded. If the recipe calls for peeling or other preparation, complete it consistently rather than changing treatment halfway through. Label your notes with the recipe source and date. This makes it possible to reproduce a result later and separates an equipment question from differences in ingredients. Avoid changing three recipe variables simply because the first tray seems slower than expected.
Make an oven schedule before starting
Dehydration is a long process, and Wolf notes that the mode overrides the usual twelve hour shutdown. Do not rely on a normal cooking cutoff to end the session. Choose a start time that allows you to follow the recipe and remain available to supervise the appliance. Include time for preparation, progress checks, handling the finished batch and restoring the oven for its next use. A cycle that occupies the cavity can conflict with dinner even when the controls are working correctly.
Write the start time somewhere visible rather than relying on memory. Use a separate reminder if helpful, understanding that a reminder does not necessarily stop heating. Review the owner guide's instructions for ending the mode before you begin. If another person will take over, give them the recipe, current stage and shutdown instructions. Do not leave an unfinished handoff consisting only of a statement that something is in the oven. The next person needs enough information to make a responsible decision.
Arrange racks without blocking the intended airflow
Wolf advises against placing foil or parchment between food and dehydration racks because that traps moisture and extends drying. Use the arrangement specified by the recipe and compatible kit rather than adapting a baking setup automatically. Confirm that the rack supports are secure before loading food, while everything is cool. Keep preparation tools and packaging out of the cavity. A photograph of the initial arrangement can be more useful later than a vague recollection that several trays were used.
Document rack positions and whether the load occupies one rack or several. If the instructions call for turning food or repositioning racks, plan that work in advance and use appropriate protection for hot components. Do not invent extra handling steps to make the process feel faster. When comparing two sessions, use the same initial layout whenever practical. Otherwise, a difference in drying may reflect a changed arrangement rather than a fault with the oven's heating or circulation.
Use the correct start sequence
The official general guidance says not to preheat for Dehydration. The sequence for selecting the mode differs between product generations, so use your model's controls rather than a generic combination of buttons. Confirm the displayed mode and selected temperature before leaving the panel. Keep a record of the actual setting; do not simply write low heat. If the desired mode is missing, revisit the model guide instead of substituting another mode and assuming it is equivalent.
For owners who prefer a demonstration, Wolf publishes an official M Series Dehydrate Mode video. It is an external manufacturer resource, not a video produced by this independent service. Watch it only with the model distinction in mind. A video can make an arrangement easier to understand, but the matching owner guide and accessory instructions remain important. Pause before copying any operation if the controls, rack system or cavity shown differ from the appliance in your kitchen.
Record observations that explain a result
A useful batch record contains the recipe, preparation, rack layout, selected mode, setting, start time and the times of any instructed handling. Add short observations rather than judgments such as bad oven or perfect temperature. For example, describe which rack had the slowest result and whether pieces on that rack were thicker. If you changed a setting, record the original and new values with the time. That prevents an apparently controlled comparison from hiding several unrecorded adjustments.
Avoid opening the appliance repeatedly just to inspect it without a purpose. Follow the recipe's checking method and schedule. When the result is inconsistent, review the recorded preparation before starting another full batch. One change at a time makes the next attempt informative. If pieces on all racks behave differently from expectations, that is a different report from a small group of unusually thick pieces taking longer. Neither observation alone identifies a failed component, but each helps frame a better question.
Separate process questions from service concerns
A missing accessory, unfamiliar control or unclear recipe is a reason to obtain instructions before using the mode. An error message, damaged door component, abnormal operation or inability to end heating requires a different response. Stop using the affected function and seek appropriate assistance. Do not continue a batch to prove that a concerning symptom is reproducible. Never remove oven panels, alter a latch or attempt electrical work as part of an owner cooking experiment.
When contacting service, provide the model, cavity, exact message if any, selected mode and a concise description of what happened. Include the compatible kit details and a photo of the setup if available. Say whether ordinary cooking modes have also shown a concern, without running additional tests solely to collect evidence. Our service is independent and does not claim Wolf Factory Certified status. Manufacturer support can help resolve product instructions; a repair assessment addresses faults that cannot be explained by the correct operating procedure.
Close the session with a usable record
End the mode as directed, handle the food according to the recipe and allow equipment to cool before cleaning or storing accessories. Keep the kit components together with their identification so the next session does not begin with another compatibility search. Note what you would repeat and the single change you would consider next time. A short, accurate record turns a lengthy first experiment into a useful reference while keeping appliance operation, recipe decisions and repair questions clearly documented.
Official resources and related reading
Wolf Dehydration mode guidance
Wolf dehydration kit compatibility
